What You Need to Know
Your email address is tied to critical account functions such as login alerts, OTP verification, and service notifications. If your current email becomes inaccessible or outdated, updating it immediately is not optional; it’s a security requirement.
This guide walks you through the exact process to update your email on the XenFi dashboard efficiently and without errors.
Step-by-Step: How to Change Your Email Address on XenFi
1. Log in to Your Xenfi Dashboard, Start by accessing your XenFi account using your current credentials. If you can’t log in, this process won’t work, fix access first.
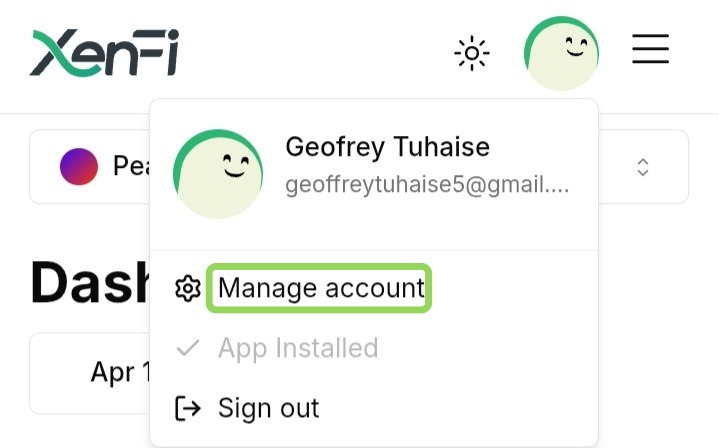
2. Click on the Profile (Doll) Icon, Once inside the dashboard, locate the profile icon (doll icon), usually positioned next to the menu icon(three horizontal lines). Click it to reveal account options.
3. Select “Manage Account”, click on Manage Account. This opens your profile window, where your account details are displayed.
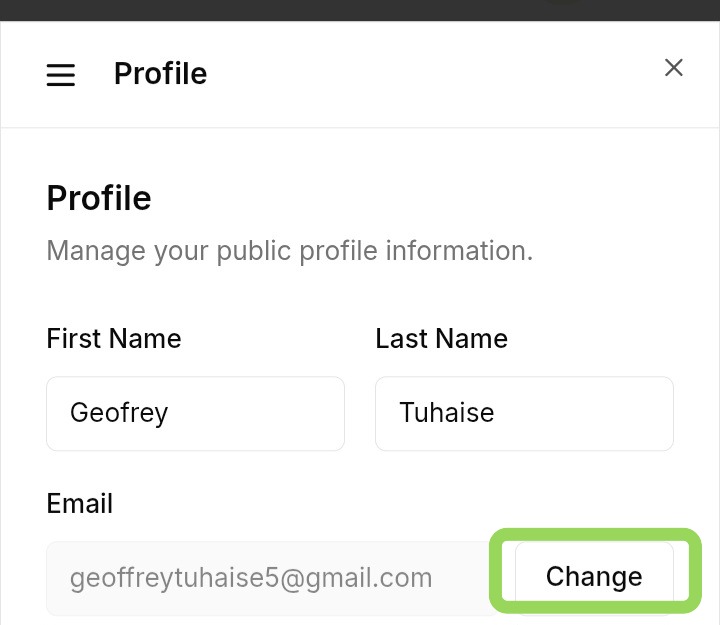
4. Click the “Change” Button Next to Your Email, In the profile window, locate your current email address. Click the “Change” button directly opposite it.
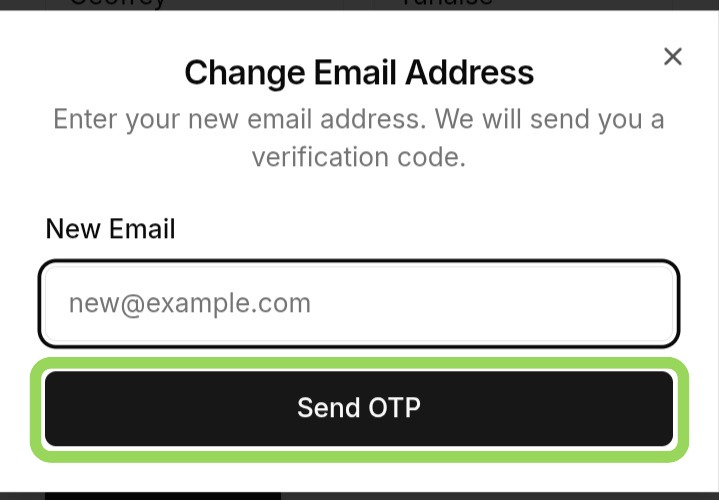
5. Enter Your New Email Address, A Change Email Address popup will appear. Input your new email address carefully, Double-check for typos, this is where most users fail.
6. Click “Send OTP”, After entering your new email, click the “Send OTP” button. XenFi will immediately send a One-Time Password (OTP) to the new email address.
7. Verify the OTP, Open your new email inbox, Locate the OTP message, Enter the OTP into the popup window, If the OTP is wrong or expired, the process resets.
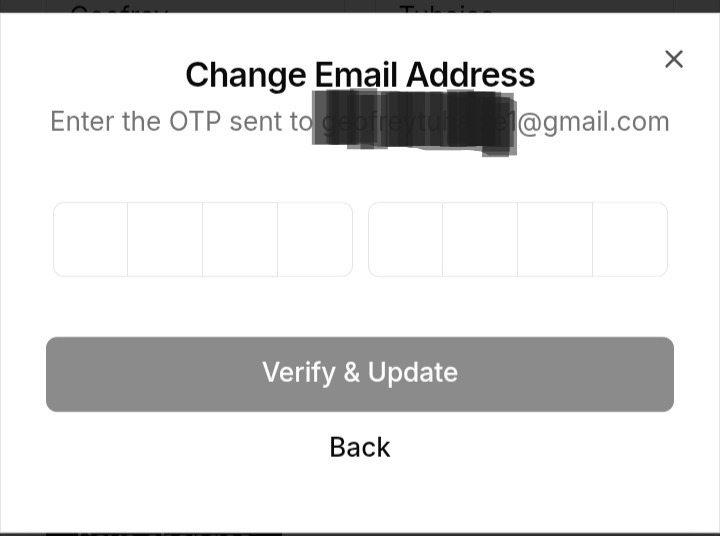
8. Email Successfully Changed, Once verified, your email address is updated instantly. You’ll also receive a security notification on your old email address confirming that the change has been made.
NOTE: If you're not the one who initiated the process, reach out to our support team as fast as you can.
Important Security Notes (Don’t Ignore This)
Always use an email you control, shared or temporary emails are a liability
OTP expires quickly, act immediately after receiving it
If you didn’t initiate the change, act fast and contact support
Common Mistakes to Avoid
Entering the wrong email (you won’t receive the OTP)
Delaying OTP entry until it expires
Ignoring the confirmation email on the old addres
Changing your email on the XenFi dashboard is straightforward, but only if you follow the process exactly. Most failures come from carelessness, not system issues. Treat your account credentials like infrastructure, because they are.
