Enhancing Network Control with PPPoE
PPPoE (Point-to-Point Protocol over Ethernet) is a method used to manage and authenticate users>As networks continue to grow in size and complexity, traditional hotspot setups are not always sufficient to meet increasing demands. To address this, XenFi is introducing PPPoE support—a powerful feature that enables more advanced user management, improved authentication, and greater control over network access.
As networks continue to grow in size and complexity, traditional hotspot setups are not always sufficient to meet increasing demands. To address this, XenFi is introducing PPPoE support—a powerful feature that enables more advanced user management, improved authentication, and greater control over network access.
Accessing the PPPoE Feature in XenFi
The following steps will guide you;
Requesting the PPPoE Feature
Step 1
Log in to your XenFi dashboard and navigate to the Accounts section.
Click>New Request.
Under Request Category, select Feature Access, and under Feature, choose PPPoE Capabilities.
Provide a valid reason for your request and submit it. After submission, please wait patiently as the team reviews your request.
Step 2
Once the review is complete, you will receive an email regarding your request.
If your request is approved, a PPPoE option will appear>Vouchers and Remote Access.
Configuring PPPoE
Step 1
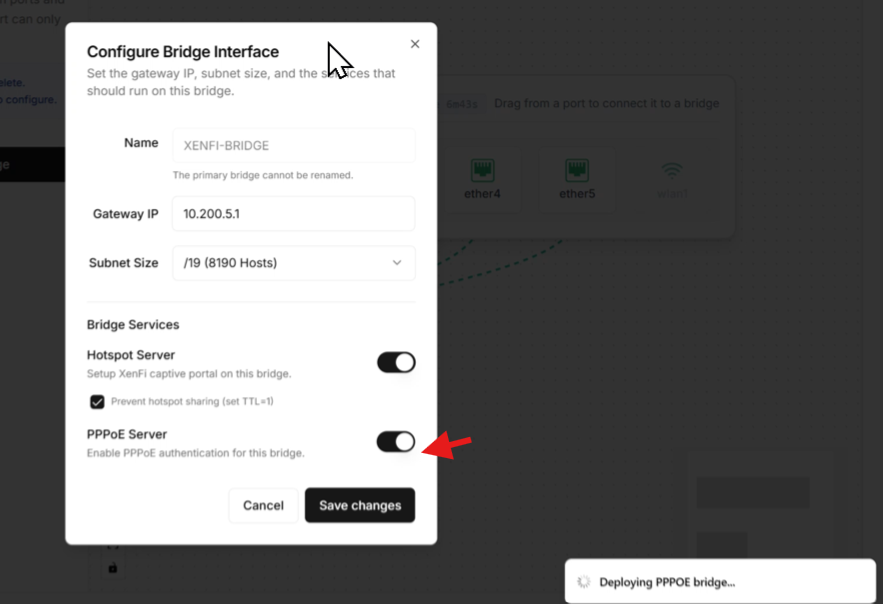
Go to Router Setup and click Add New Bridge.
Then bridge all the ports. A configuration panel labeled Configure Bridge Interface will appear.
Enable the PPPoE Server toggle for the configuration to take effect.
Step 2
Click Save Changes, then copy the command that appears and paste it into the Winbox terminal.
Once the script runs successfully and displays a “Deployment successful” message, the PPPoE server will be fully configured.
Setting Up PPPoE Users
Step 1
Go to Packages → PPPoE Plans → Create Package.
Enter the required details such as:
Name
Plan validity
Shared users
Price
Speed limits
Step 2
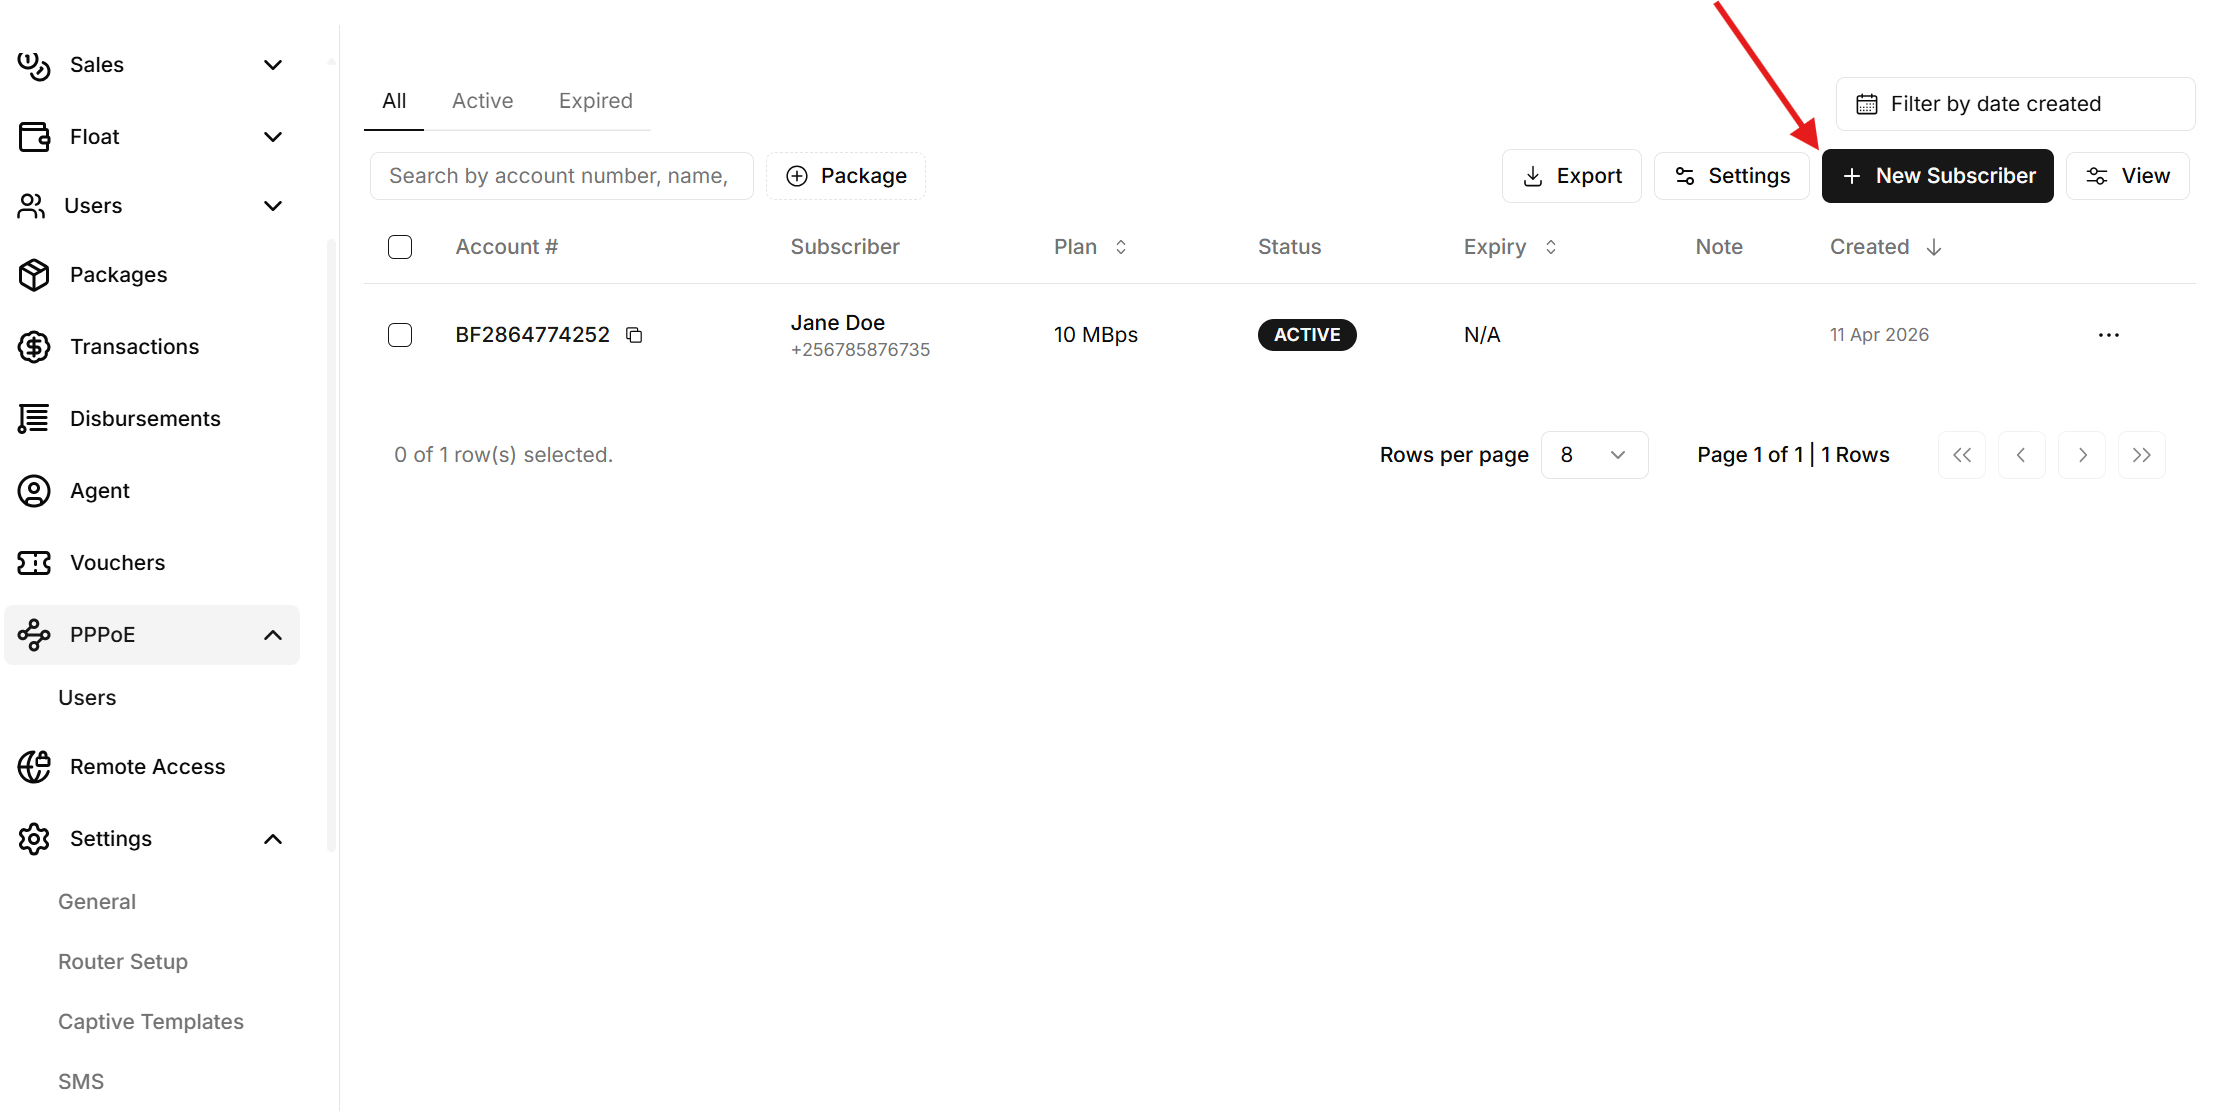
Navigate to the PPPoE section, then go to Users and click New Subscriber to add a client.
Step 3
Fill in the client’s details, including:
Name
Email
Phone number
Postal address
Installation address
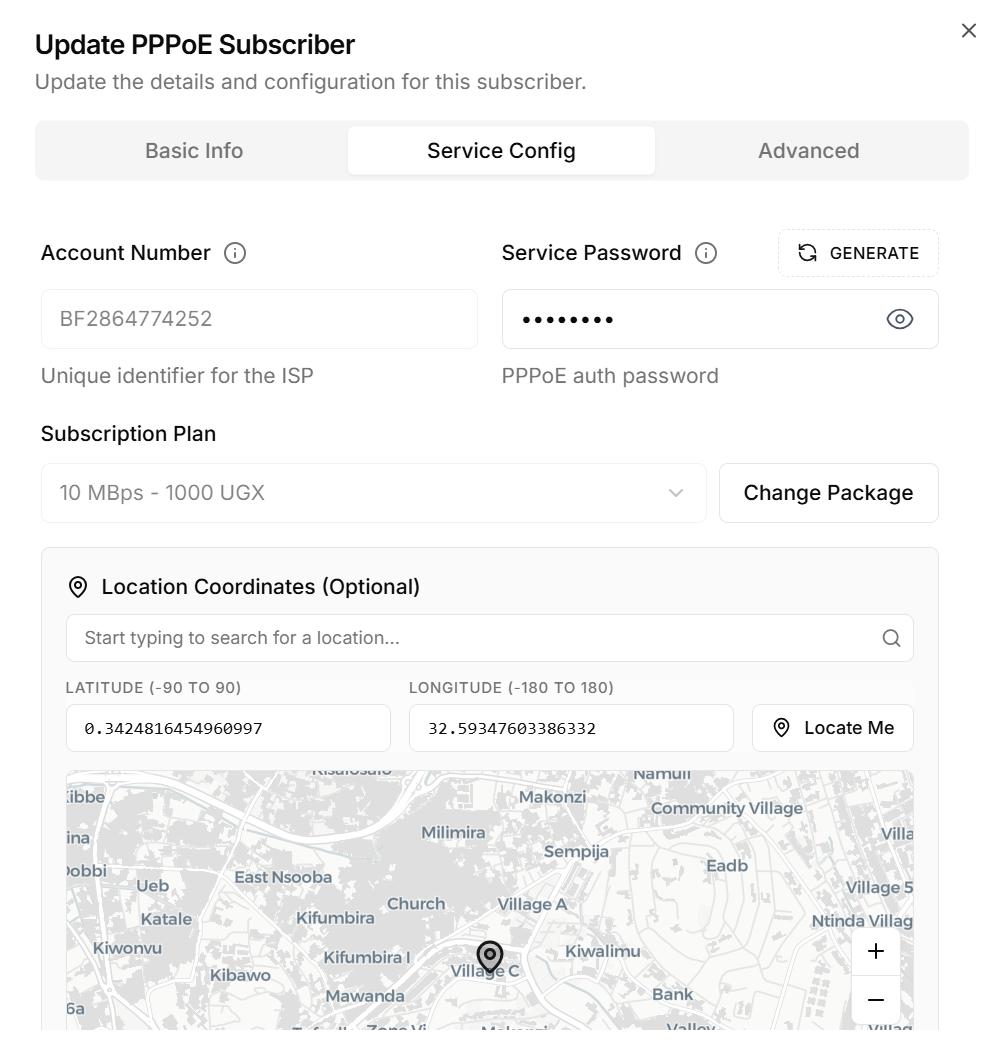
Under Service Configuration:
Select a subscription plan from the PPPoE plans you created earlier.
Step 4 (Optional)
Set the location coordinates by either typing your location or clicking Locate Me.
Note: For advanced setups, you may leave this as is, since RADIUS configuration is already handled when running the router setup script.
Step 5
Click Create Subscriber.
Your client will now be successfully added.
Connecting a Client to the Internet via PPPoE
Step 1
On the far right side of the subscriber entry, click the three dots to view client details.
Note: If Billing starts>Upon First Usage, the expiry time will begin counting down only after the client first logs in.
Step 2
Copy the username and password for the created subscriber.
Step 3
Visit the router’s default access page (e.g., tplinkwifi.net).
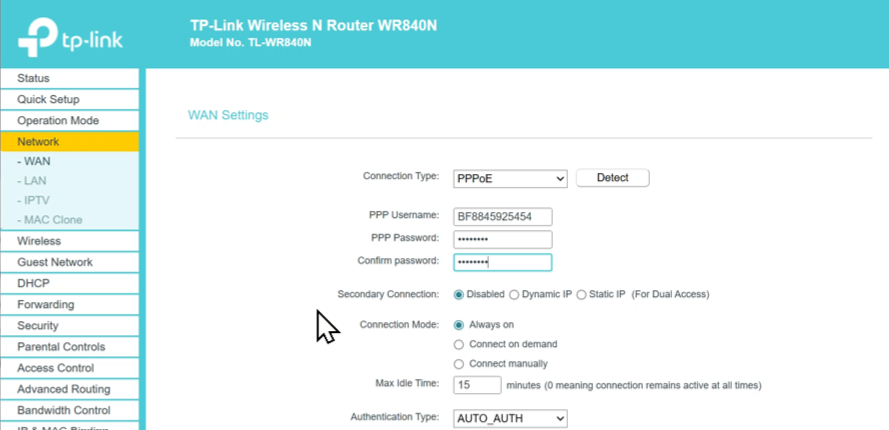
The client will now have internet access, and the subscription time will begin counting down.
Note: If Billing starts>Upon Payment, the subscription time begins immediately after payment.
Mobile Money Payments
For clients who prefer to pay using mobile money:
The client will enter their mobile money PIN and will be connected instantly after payment.
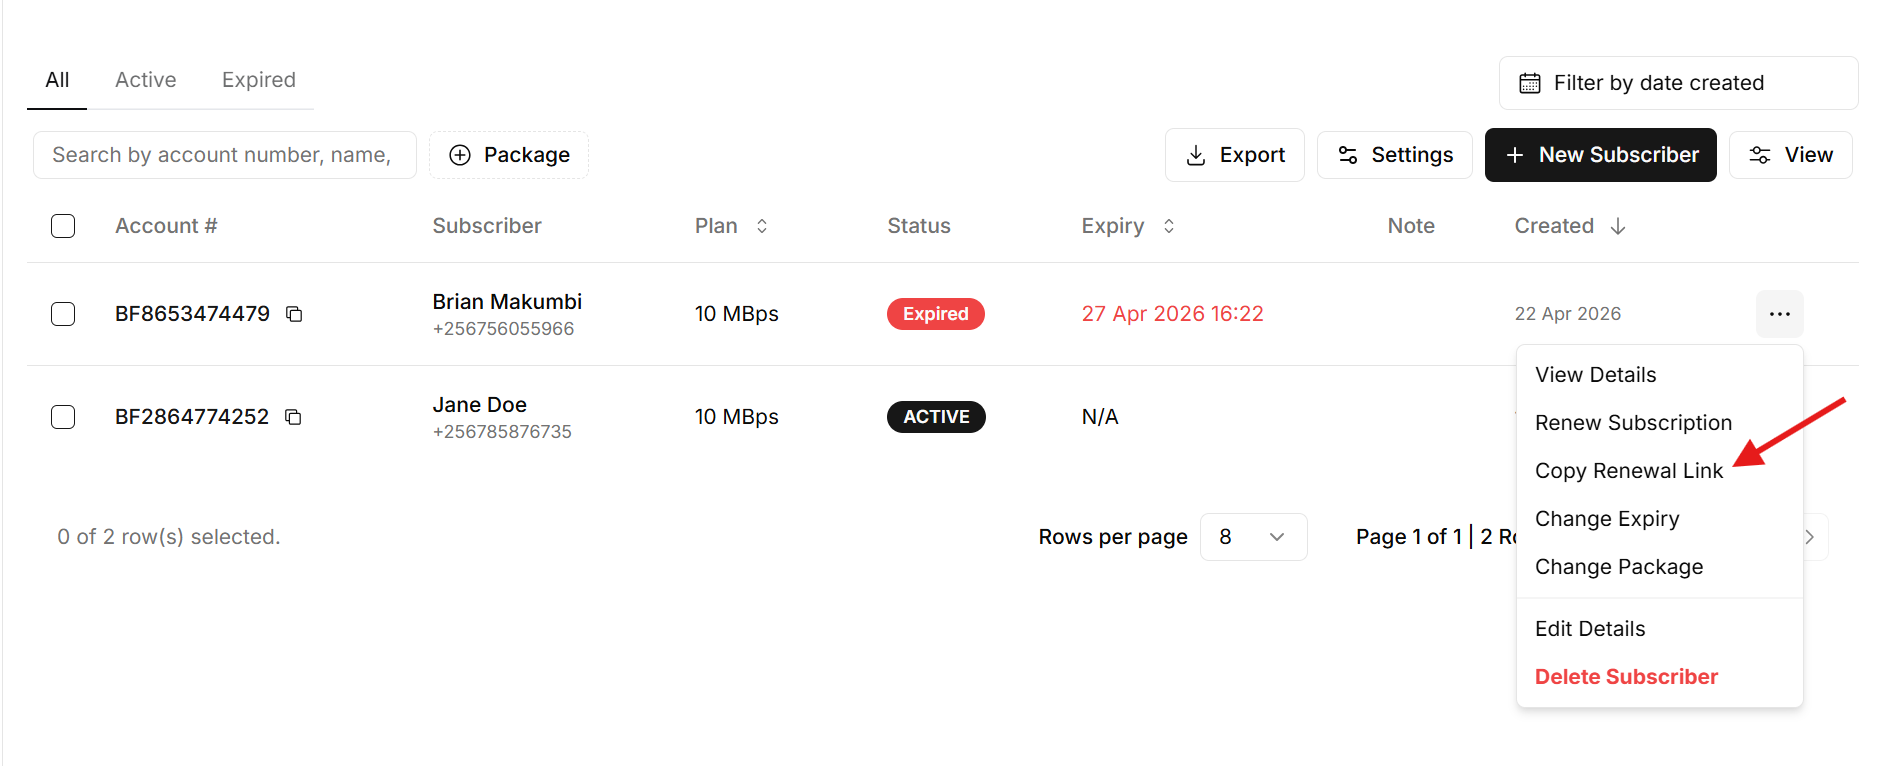
Subscriber Management Actions
You can perform the following actions for each subscriber:
View Details – Displays account information and subscription details
Renew Subscription – Extend the client’s subscription period
Copy Renewal Link – Allows mobile money payment for renewal
Change Package – Switch the client’s plan
Edit Details – Update client information
Delete Subscriber – Remove the subscriber
